Showing posts with label design/build. Show all posts

Sunday, July 27, 2008

Walnut Bed is done!


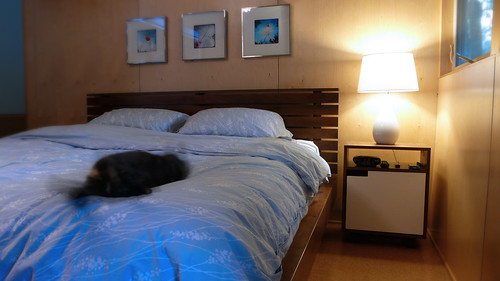
I got the bed done last week as promised just in time for the scout for Better Homes and Gardens to come by and look at the house. She liked it and they snapped about 30 pictures of the place to show to the editors. I don't know when I will know something about if they want to shoot the house or not. My friend Bob Greenspan is going to be taking the photos and he said that a local magazine he shoots for is interested as well. So hopefully one of these will pan out and you all can be looking at pictures of the house in a mag. Barrett came over and took some pictures while I had the place cleaned up. Here is a shot of the bed and the nightstand. As you can tell it didn't take Bella long to find her spot and do some power napping.

Monday, July 14, 2008

Busy Weekend


I had some exciting news last week this Wed. a scout for Better Homes and Gardens is coming to take a look at our house to see if they are interested in photographing it. Jessica is out of town on vacation so that nominates me to get the house all cleaned up and ready. It also made me tackle projects I had been procrastinating on for months. So look for some really nice pictures of the place at the end of the week.


Back of Bed headboard.


The bed prior to being disassembled for finishing.
Posted by Picasa

Monday, June 30, 2008

Bed Progress


Well I enjoyed the unusually cool weather this past weekend and made some serious progress on the bed. I've begun to make a big push to get this and a few other little jobs done I'm hoping to get the house photographed sometime late summer. So here is the base of the bed all assembled it went together extremely well and is rock solid. I may add a few more reinforcements but I'm going to wait till I get the headboard on and see how that stiffens it up. Since its bee so long you have to look back a ways to find the old post of the bed design.


Barrett came over and helped on Sat. and Sun. trying to teach him a thing or two along the way. Sunday we planed down a huge stack of oak I recently got a really cheap deal on craigslist. Of the 20 3"thick 10" wide 8' long boards four of them were white oak(which I plan on using for some outdoor patio furniture this fall) I had a few that were birch, and a bunch that were red oak. So after getting them planed down the next task will be cutting them into the slats that make up the base of the bed.


I'm quite proud of my ingenious little method to hold the frame together, just a simple 1/2" bolt in the corners. It worked really well and is incredibally strong.
Posted by Picasa

Monday, March 10, 2008

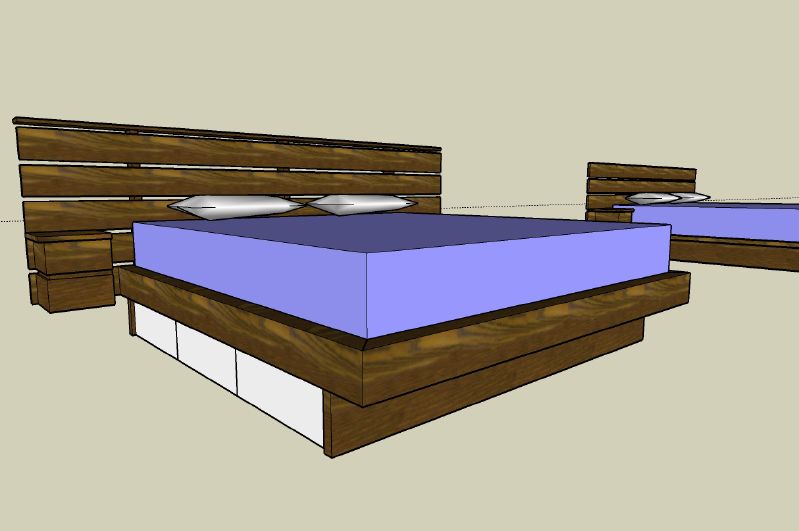
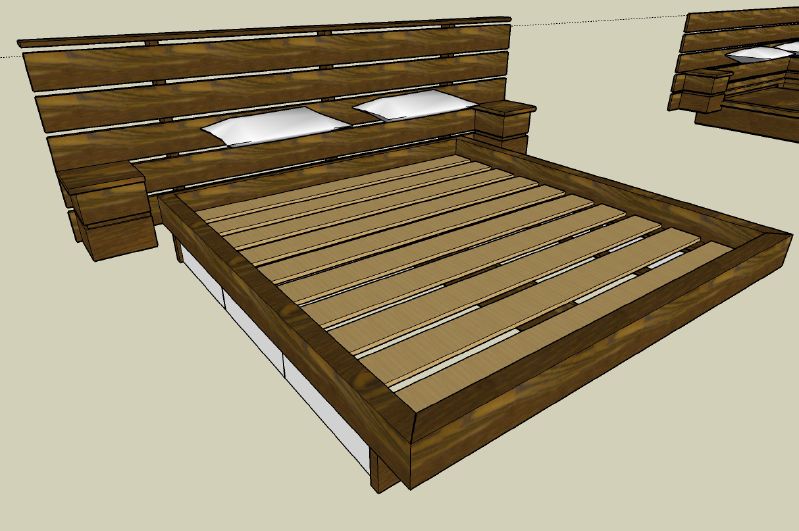
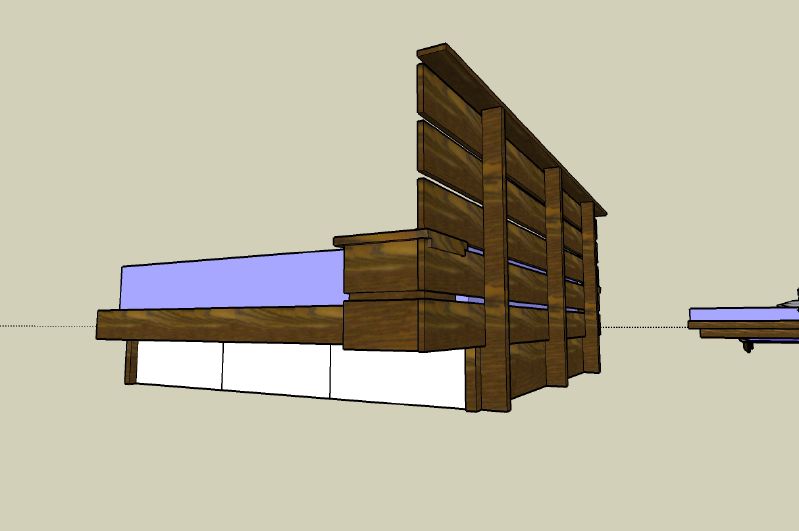
Our Platform Bed Design


Ok here are some preliminary images of the bed. I havn't really resolved the built in nightstands but everything else is very close to what the final bed will look like. Let me know what you guys think.

Monday, January 21, 2008

The Dresser is Completed

Well last weekend Eric and I finally put the finishing touches on his dresser. Barrett from the Noshery came over and took a few pictures for me on his fancy new camera. I'm really pleased with the way it turned out.

A detail of the Paduak drawer pulls.
Posted by Picasa

Tuesday, January 15, 2008

Storage Units in Transit

Here is a pic from last weekend. All but one of the record storage units are done(yes I screwed one of them up). Here is a shot of them in the trailor we used to move them. As soon as they get completely assembled and done I'll post some more pictures. Let me know what you all think.
Posted by Picasa

Friday, January 11, 2008

Record Storage is almost done

Well its been a while since I posted. I havn't really been up to a whole lot. I got the record storage units built and Doug my painter sprayed them with lacquer this week. I must confess I did screw one of them up, so I have to make one more. Here are some pictures I took while I was cutting all the material, and glueing them up. I'll be selling my tablesaw soon I found a larger saw for myself so if anybody who reads this is interested just message me.
This is the various shapes all cut out ready for glue up.
Glue up was a real pain since the shapes are so complex. I think they turned out pretty cool, not as perfect as I imagined them but hey I'm still getting the hang of this. I have several other projects on the boards. My neighbor Eric and I are gettting ready to start a small desk for his house. I'm also getting ready to start on a Teak shower bench for a project I helped design at work. I possibly have a few more bookcases for another client and I'm also talking to someone about doing a small childrens bed. So as you can see the work is piling in but thats good I'm trying to save up to buy a truck to make things alot easier.
Posted by Picasa

Thursday, December 13, 2007

Dresser is Almost Completed

Eric's dresser is almost completed. These pics are from over a week ago, taken the night we mounted all of the drawer slides. We thought it looked pretty good in this form.
I can't wait till we get the Walnut and Paduak drawer fronts on this thing is going to be awesome. I think Eric is really pleased with the way everything turned out. He did the majority of the work, I supplied the tools, a little bit of knowledge, and a little bit of design.
We went with Walnut for the drawer bottoms to contrast nicely. The back panel is Walnut as well. I really like the color the Shellac gives the Walnut though Eric said it was a pain to put it on. As you can see we went with the full extension drawers, a lock rabbit on the drawers to hold up to some good use.

I'll try and get some pictures of it when its completed. If you like the dresser let me know, If you want one for yourself just email me that can be arranged. I should be finishing up the record storage by the first of the year at the latest, so I'll post some more pictures of that in the future.
Posted by Picasa

Monday, December 03, 2007

Record Storage Update.


Well I thought I would post a little update picture of the record storage system I'm building for Rod. I've got two of them completed and set up to complete several more this week. I thought I would get a few more done this weekend but I got rearended in Jessica's car on saturday, so now its sitting in the garage.

Thanks to all of you who came through and voted on the contest. We ended up about 10 votes short according to their website, but who knows how accurate that is. Keep your fingers crossed for me, we will find out about the winners of the contest on Friday.
Posted by Picasa

Wednesday, October 31, 2007

Ready for Production

Well I got the garage all cleaned up and ready to start making some furniture. In the past couple of weeks I've wired a subpanel, and added a few new circuits with new outlets so I have all the juice I need for some sawdust making. Here is a shot of the garage all cleaned up and ready to go. You can see the stack of plywood front and center, that should be enough to make all of the Record Storage Units.
The design has changed quite a bit since you guys saw it last. I may still build a unit or two of the other design, especially if any of you want to hire me to do it. The record storage is now going to occur in stacking pieces, just like the Tetris video game. It will be a much more flexible solution that will allow the unit to adapt with changes in location. So the image above shows two versions of the units with records and the image below shows the same units without records. I'm making it out of Baltic Birch plywood with an exposed edge and Walnut backing where needed. Let me know what you guys think.
Posted by Picasa

Friday, October 19, 2007

Workbench for under $200

Well I have the workbench nearly completed. I constructed the legs and got them clamped and glued together.
You attach the two sets of legs together with two plywood panels. I drilled pocket holes for screws to attach the top. It was the first time I had used a pocket hole jig and I have to say for a really simple operation it works really nice.
Here is a shot of the new bench sitting on the old bench. I must say those rubbermaid trashcans are quite sturdy. I would guess the bench is close to a hundred pounds.
I don't have the top screwed on yet but you get an idea of what this thing is going to look like. I have a vise on the way, so I should get that installed next week. Eventually I plan on making drawers to fill out the bottom of the bench. I highly recomend this workbench to anyone, its cheap, relatively easy to build, and extremely solid. I only have about 10 hours of work in it so far, 3 sheets of plywood, a quart of wood glue, and a box of screws.
Posted by Picasa

Tuesday, September 25, 2007

First Commision; Record Storage

Well thank you all for voting as to what I should tackle next. The bed won hands down, so it looks like I will be starting it soon. I've already got a preliminary design but I'm not comfortable enough with it to put it up for critique. I kind of fell into my first possible furniture commision. While shopping for some furniture at Retro Inferno to use a Wedding gift card, I happen to talk to the owner Rod Parks. He just so happens to need some Vinyl Record storage for his house, we started by talking about trading some Crate and Barrell gift cards for in store credit. Then the more I thought about it I just offered to build them for him. Here are the preliminary designs for the storage units. He wanted something flexible enough so he could rearrange them as his furniture changes in his home (oh the joys of owning a furniture store).


This is the version I like the best. Walnut exterior with a white lacquered interior.

Similar to numero one, just not quite as nice.

He talked about an all white version so I had to show him how much better some Walnut would look.
Posted by Picasa

Thursday, August 23, 2007

Mirror is completed.

Well I finished the mirror last weekend as well as many other little things that were on the list to be completed by our wedding reception. This first picture shows you all how I hung the mirror on the brick. I used what is known as a french cleat to attach it on the wall. Don't ask me why its known as a french cleat, its kind of like french toast or french fries. They really aren't French but they get stuck with the name anyway. It works on a really simple principal, you simply attach the piece that is sitting on the right to the wall then the one on the left to your mirror or cabinet and you simply hang the mirror on the wall. The corresponding miters on the two pieces lock to gether to be a very strong and stable conection.
A picture after I drilled and screwed the cleat on the brick wall.
A shot of the completed mirror. It ended up costing me about $6 worth of walnut, $20 for the mirror at Home Depot, The scrap of MDF was left over from other jobs and the finish only cost me a few beers for Doug. So I would say it turned out pretty well for a project under $50. It really improves that lower bathroom.

I had a large list of things to complete before the wedding reception in two weeks. I got the transition strips fabricated, finished, and installed in all the areas that go from tile to cork etc. I finally got the frosted glass in the bathroom stopped in place. I finished painting the lower stairs and the garage has been cleaned. I actually have them all completed already, so this weekend I'm going to work on getting the house numbers my brother made put on the house. I'll take pictures and post them in a couple of weeks.

We leave on Monday to go to Califonia to get married. So if you could wish Jessica good luck, and wish me some patience everything will go great. We will see many of you at our open house/reception on Sept. 8th.
Posted by Picasa

Friday, August 17, 2007

Making a Mirror for the Bathroom

Here is the steps I took to make a mirror for the downstairs bathoom. First I cut out a rectangle of mdf the size of the mirror. Then I selected a piece of rough walnut. I used the jointer to get one edge flat then ripped them for width on the table saw. Then I used the jointer to make on of the faces perpendicular to the edge. Then with a couple of passes through the planer to clean everything up. Then I used a little glue and the brad nailer to nail everything up. Doug sprayed the whole assembly with Lacquer for me. This weekend I hope to get it hung. I'll post more pictures next week.
Posted by Picasa